London Fog... Finished!
This particular blog post is going to be on-going. Check in once a week to see how I'm doing.
Tuesday, August 1, 2017
Getting Started ... Finding a Great Idea
I went to England to visit my son and his bride. Their birthdays are within six weeks of each other so I asked if I could do a stained glass project for their birthdays. They have a sweet kitchen cabinet that has room for just such a project. Not only did they say, "Yes!" they asked that it have a London Fog theme. "Sure," I answered with more enthusiasm then sense.
Now, I'm at home in front of my drawing board. What does London Fog look like?
Maybe this is easer than I thought!
 Ta Da!!
I don't think this is what they had in mind... London Fog!
 Now, I look like a smart-alec!
So, I went to Denny's and contemplated London Fog...
How do you show the fog in London and the attractions that can be seen through the fog? First, what are the attractions can and should be seen?
What if I show the London skyline with near clear to clear glass and use a copper patina "in the fog" to show iconic sites in the distance. Then use more brilliant glass and a black patina in the foreground?

I took took these ideas home and came up with this...

I'll be back later to show you how my idea is playing out.
August 3, 2017
Moving Forward

I'll continue working and see how I do.
 Sunday, August 13, 2017
Choosing the glass to cut.
Items in the foreground have more brilliant color and will have dark outline. To create a feeling of distance and items as seen through a fog, I chose pastel tones for the building and clear or near clear glass to indicate line. A copper patina should assist with the allusion of distance.

 Without the copper foiling and patina it's difficult to see the lines. When I finish the foiling, the end should show a bit more clear.
Sunday, August 20, 2017
Putting the puzzle together.
When cutting and placing your cut pieces onto your pattern or a light board, it's difficult to see the end result. Especially with this pattern, as many pieces are clear or near-clear. It was a bit daunting to see the pieces on the light table and the pieces did not appear as my imagination saw it. I persevere and trust my gut.


Sunday, September 10, 2017
Solder, Cleaning, Patina, and Finished
Soldering requires a special talent. With a little practice, I'm getting better. I have a new soldering iron and that seems to help too.
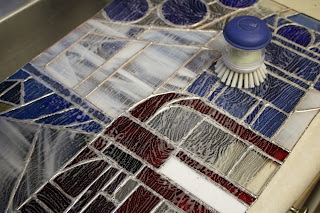
The flux must be removed and then a bit of a scrub with soap and water will help remove the loose flecks of solder and numbers made with Sharpie.
Patina for a dark colored solder for the elements in the picture that are close (the double decker, lamp-posts, phone booth, umbrella, and Joel and Nicole).

A copper colored solder was added for elements that would be far away and in the fog (Tower Bridge, the London Eye, and the cone).

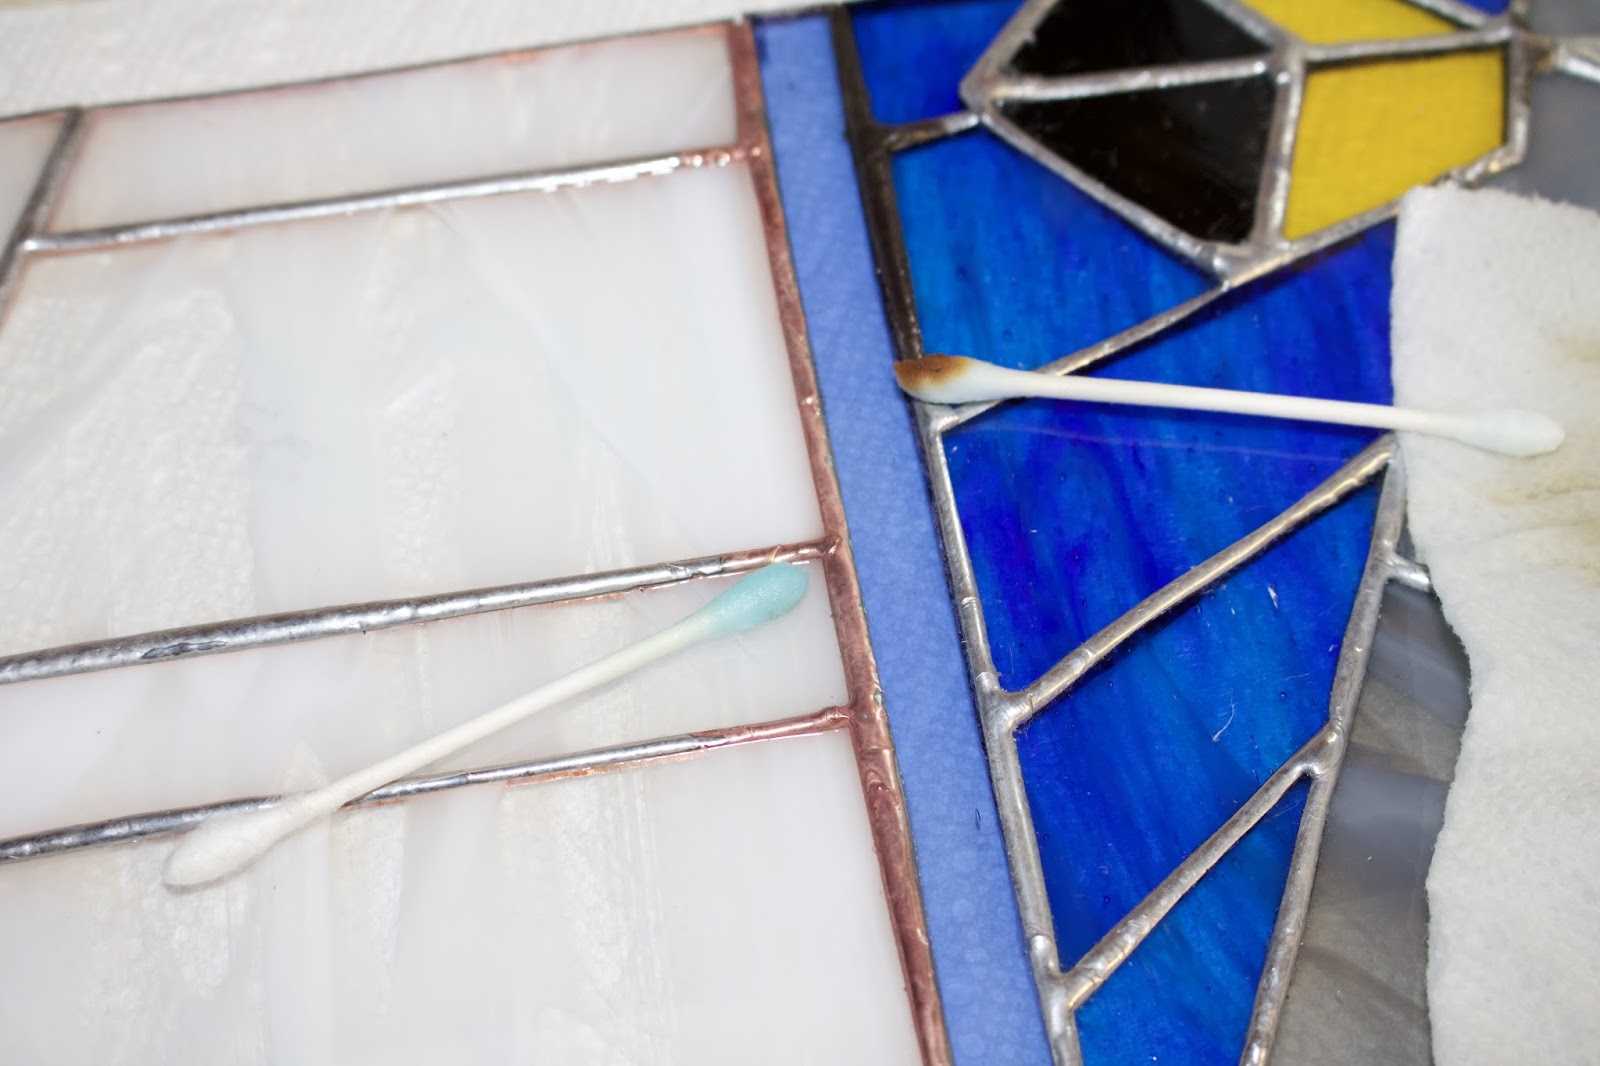
Patina colors that butted up against each other were unusual. I assumed that if I was not careful the dark patina would overpower the copper. This was not so. The chemical reaction for turning the solder to a copper color was a much stronger reaction. I had to carefully protect the darker solder. It's an interesting experiment and I'll be interested to see what this does over time.

I polished the solder and the glass carefully cleaning each crevice.
I was really pleased with the results. We'll have to see what the glass looks like when in their permanent home. All that's left is for Rich and I to carefully encase and send these glass pieces off. (Hint: Joel should upload a picture here. See Below!)
Tuesday, August 1, 2017
Getting Started ... Finding a Great Idea
I went to England to visit my son and his bride. Their birthdays are within six weeks of each other so I asked if I could do a stained glass project for their birthdays. They have a sweet kitchen cabinet that has room for just such a project. Not only did they say, "Yes!" they asked that it have a London Fog theme. "Sure," I answered with more enthusiasm then sense.
Now, I'm at home in front of my drawing board. What does London Fog look like?
Maybe this is easer than I thought!
 Ta Da!!
I don't think this is what they had in mind... London Fog!
 Now, I look like a smart-alec!
So, I went to Denny's and contemplated London Fog...
How do you show the fog in London and the attractions that can be seen through the fog? First, what are the attractions can and should be seen?
What if I show the London skyline with near clear to clear glass and use a copper patina "in the fog" to show iconic sites in the distance. Then use more brilliant glass and a black patina in the foreground?

I took took these ideas home and came up with this...

I'll be back later to show you how my idea is playing out.
August 3, 2017
Moving Forward

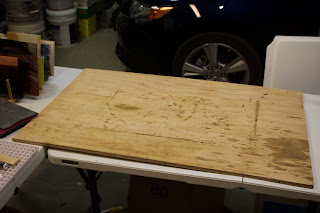
First the set up. A board that will hold the glass and pattern secure. Next, I have to consider the glass I have in stock and make a run to buy the glass I need.

Ready, I'll start with the pattern in the bottom left corner and move up and to the right.

Choosing the glass to cut.
Items in the foreground have more brilliant color and will have dark outline. To create a feeling of distance and items as seen through a fog, I chose pastel tones for the building and clear or near clear glass to indicate line. A copper patina should assist with the allusion of distance.


Sunday, August 20, 2017
Putting the puzzle together.
When cutting and placing your cut pieces onto your pattern or a light board, it's difficult to see the end result. Especially with this pattern, as many pieces are clear or near-clear. It was a bit daunting to see the pieces on the light table and the pieces did not appear as my imagination saw it. I persevere and trust my gut.

Foiling was a huge help! It help define the line and help me see where the line started and stopped

Soldering is not my strength, but I'm getting better. After applying flux, I put pieces of wood where I might rest my hands. This helps me keep my hands clean and out of the acid. It's difficult to see in the above paragraph, I dotted a section of the project with solder. This prevents the pieces from moving while I completely solder the section.

I will place, dot, and solder small sections until I've completely soldered both sides of the project.
Sunday, September 10, 2017
Solder, Cleaning, Patina, and Finished
Soldering requires a special talent. With a little practice, I'm getting better. I have a new soldering iron and that seems to help too.

The flux must be removed and then a bit of a scrub with soap and water will help remove the loose flecks of solder and numbers made with Sharpie.
Patina for a dark colored solder for the elements in the picture that are close (the double decker, lamp-posts, phone booth, umbrella, and Joel and Nicole).
A copper colored solder was added for elements that would be far away and in the fog (Tower Bridge, the London Eye, and the cone).

Patina colors that butted up against each other were unusual. I assumed that if I was not careful the dark patina would overpower the copper. This was not so. The chemical reaction for turning the solder to a copper color was a much stronger reaction. I had to carefully protect the darker solder. It's an interesting experiment and I'll be interested to see what this does over time.

I polished the solder and the glass carefully cleaning each crevice.


I was really pleased with the results. We'll have to see what the glass looks like when in their permanent home. All that's left is for Rich and I to carefully encase and send these glass pieces off. (Hint: Joel should upload a picture here. See Below!)
 |
| Ta Da!!! |


Love the design
ReplyDeleteI agree with rhonda. I also really like your light box. It has such a neat effect in pictures.
ReplyDeleteBeautiful!!!!! Nicole is going to die!
ReplyDeleteWondershare PDFelement Registration Key
ReplyDelete