How to post!

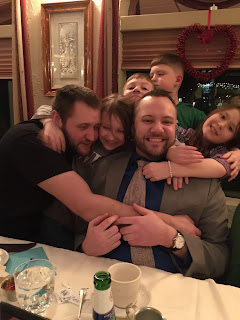
Its me! I'm the one in the middle. It may seem like I just broke one of my rules here, but think of it like having fun in a classroom. You are not supposed to have fun, but sometimes you do so that the kids will pay attention.
Well...now that I have your attention.
This is how you post to Blogger.
It is no harder than writing a letter on Microsoft Word or making a post on Facebook. Easy Peasy. Trust Me. This tutorial would be 20 seconds long if I was in your living room.
Step One: Follow the link.
You received an invitation from google or blogger to be a content creator/contributor/editor. Follow this email link. This gives you access and permission to post on this blog. Without following that link. YOU CANNOT CONTINUE. So, if you have not done so, go back to your email and find it. Follow it.
Step Two: Go to Blogger
Place your cursor in the navigation pane of your favorite browser (modern Smartphones work too!), and navigate to http://blogger.com or click this link.
Blogger is owned by Google. I am learning it myself. I fancied making some posts a few years back on Google Voice. You will be able to make your own blogs here or whatever you want.
If you followed both steps correctly you should see a screen that looks like this. Where indicated it wont have my picture it will have yours. Note the details..."Blair Projects Blog" and "Using Blogger as Holly" or you get it.
If this doesn't appear there is something wrong. Place a question in the comments and I can help.
Step 3: Create New Post
Click "New Post" as indicated here.
The language used here will be familiar from Facebook. A "post" is like a little mini webpage. The very tutorial you are reading now was constructed in this fashion.
Step 4: Build your post
Your Screen should now look like this (maybe not with Nicole's name on it :-)
The controls should look reasonably familiar. Fonts, image insertion, links and tables.
The first row is what we'll cover.
Make sure to title your Post in the "Post title" pane.
The buttons on the top right-ish are the important ones. "Publish," "Save" "Preview" "Close"
Using all the tools (including HTML more on that later) construct your post just as you would like. Google automatically saves for you along the way but from time to time it is nice to just press the save button.
With the Preview button you can view what your page will look like without sharing it. This is a good time to mention that some posts could take multiple sittings to finish. This is OK. It will be listed as a draft. Just like an email. Not shared with the world.
Publish is the button that makes it all work. Once you have previewed your post and made all your beautiful edits press that Orange button.
As promised a quick little explanation of the HTML. This tool I hope is inviting and simple. The good news is that it is also powerful. Using the HTML portion will allow you to place CSS (if you don't know don't worry), embed games, tools, maps, videos, hyperlinks, portions of other websites and the list goes on.
But that is for another Tutorial.
Feel free to ask questions in the comment section. Good Luck. And Happy Posting.
PS. Dont peek at others saved drafts. wait till they publish you.


Post a Comment